Today we are going to build a neat HTML5 file uploader using ASP.NET Web API and jQuery. We are also going to include knockout.js to keep the list of uploaded files updating smoothly in real time.
In addition to all that, we will leverage on HTML5 drag and drop events , as well as HTML5 File API, to provide the file input to the application. Finally, we will use FormData JS interface to build up the request, and we will use ApiController of our ASP.NET MVC 4 application to pick up the files and save them on the server using an instance of MultipartFormDataStreamProvider.
More after the jump.
Important update
This post was originally written against Web API Beta and then updated to RC. However, now with the RTM version of Web API out, please make sure to read the new post about handling the uploads in ASP.NET Web API. No changes to the HTML5 bits required.
Source code is here on GitHub.
So, again, what are we going to do? 🔗
Our sample app will be rather simple. A simple web page, with a drop area to which users can drag files. Once you drag and drop a file, an AJAX request will be triggered sending the file over to the server which will save it in an appropriate folder, and send back a JSON file containing basic file information.
Building up the basics 🔗
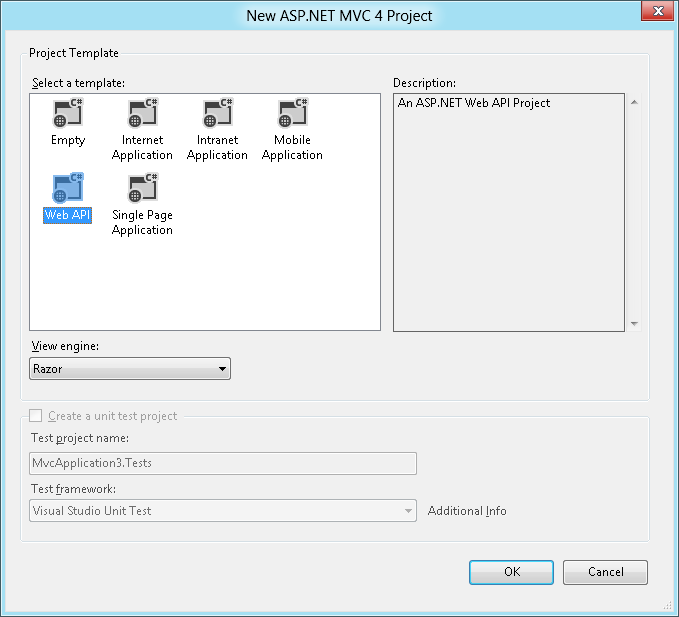
Well, we start off with an ASP.NET MVC 4 application, Web API project.
We leave everything intact for now, and go straight to our “Master Page” - the out of the box _Layout.cshtml. We need to include jQuery, knockout.js and a reference to script.js, which will be our application’s JavaScript container file.
@RenderBody()
Handling JavaScript events 🔗
Next step is to focus on the JS scripting. We will need to handle 3 events of the HTML5 drag and drop interface - dragEnter, dragExit and drop.
We can do that on document ready using jQuery.
$(document).ready(function () {
var $box = $("#ulbox");
$box.bind("dragenter", dragEnter);
//$box.bind("dragexit", dragLeave); this event is deprecated!
$box.bind("dragleave", dragLeave);
$box.bind("drop", drop);
});
Div with the ID “#ulbox” is going to be our drop area (upload zone). We bound, as mentioned, 3 event handler. Let’s inspect them.
function dragEnter(evt) {
evt.stopPropagation();
evt.preventDefault();
$(evt.target).addClass('over');
}
function dragLeave(evt) {
evt.stopPropagation();
evt.preventDefault();
$(evt.target).removeClass('over');
}
Enter and Leave events are very simple, all we do is stop the event propagation (not really necessary in our simple examples, but good practice) and add/remove a class to the drop area indicating that someone is dragging something in or out of the area. This allows us to indicate to the user that this is an active area.
Drop event is a bit more interesting.
function drop(evt) {
evt.stopPropagation();
evt.preventDefault();
$(evt.target).removeClass('over');
var files = evt.originalEvent.dataTransfer.files;
if (files.length > 0) {
//process upload
}
}
First, we do the same as we would on the exit event - remove the “over” indication. Next, we grab the files using File API, from the dataTransfer property. Notice we reference evt.originalEvent.dataTransfer, rather than evt.dataTransfer. Since we bound the events using jQuery, evt object is a javascript event, whereas evt.originalEvent is a native JavaScript event which we are interested in. By default (without extending $.event manually) evt.dataTransfer would be undefined.
If we have any files, we process the upload. Let’s have a closer look then:
if (files.length > 0) {
if (window.FormData !== undefined) {
var data = new FormData();
for (i = 0; i < files.length; i++) { data.append("items[]", files[i]); } $.ajax({ type: "POST", url: "/api/uploading", contentType: false, processData: false, data: data, success: function (res) { $.each(res, function (i, item) { viewModel.uploads.push(item); }); } }); } else { alert("your browser sucks!"); } }
``` Since we are going to use FormData to build up the request, we first check if the browser supports it. Then we loop through the files and append them one by one to FormData object, using items[] key. This way any subsequent append, doesn't overwrite the previous one. Next step is to do an AJAX post, and we will use a properly set up $.ajax call for that. Request type is obviously POST, and we are going to post to /api/uploading (which immediately suggests that our ApiController will be called UploadingController). We don't need to provide a content type (FormData object will default to multipart/form-data) and we set processData to false, as we don't want jQuery to convert our data to application/x-www-form-urlencoded, as it would automatically attempt to do otherwise. Finally, we set data to the FormData instance we built earlier, and in the callback we iterate through the JSON response and push the object to knockout.js observablearray of the main viewModel (don't worry, we are getting there).

### Displaying uploaded files list

Now that we have all the HTML5 goodies in place, let's set up the aforementioned viewModel.

```javascript
var viewModel = {uploads: ko.observableArray([])}
ko.applyBindings(viewModel);
The viewModel will only have one property, uploads, where it will keep track of the uploaded files.
The HTML is going to be pretty simple. Since we set up the _Layout.cshtml already, we will now just need to worry about the body of the default view (home/index).
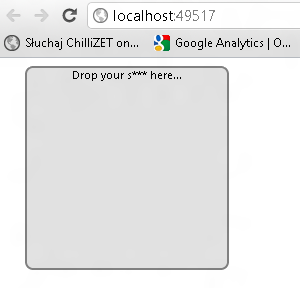
<div id="ulbox">
<span>Drop your s*** here…</span>
</div>
<ul data-bind="template: { name: 'upload-template', foreach: uploads }">
</ul>
I’m sure you recognize the familiar knockout.js bindings. First we have the drop area, then an unordered list which is bound to the viewModel’s uploads property. The template responsible for each item renders all the details regarding the recently uploaded file. The object properties are determined by the JSON object retruned from our ApiController (we’ll get to that soon).
CSS to add some look and feel 🔗
With all that, we just need a bit of CSS to spice things up, and our UI is 100% ready and waiting for the server’s ApiController to start accepting them uploads.
body {
font-size: 11px;
font-family: "Segoe UI", Candara, "Bitstream Vera Sans", "DejaVu Sans", "Bitstream Vera Sans", "Trebuchet MS", Verdana, "Verdana Ref", sans-serif;}
#ulbox {
width: 200px;
height: 200px;
border: 2px solid #DDD;
border-radius: 8px;
float: left;
margin: 0 20px;
text-align: center;
background: #e1e1e1;
border: 2px solid #808080;}
#ulbox.over {background: #3389a1;}
ul {float: left; margin: 0;}
ul li {border-bottom: 1px dotted #DDD; display: block; padding: 5px 0;}
ul li span {display: block;}
small {font-size: 11px;}
Going server side 🔗
Server side of our application is not going to be very complicated. After all ASP.NET MVC and ASP.NET Web API are there to make things easy and smooth as usually.
Essentially, all we need one ApiController, as mentioned earlier. In addition, since we wanted to return some basic information about the uploaded files, we’ll create a simple custom class as well.
The custom class will provide information about filename, filesize and server file path after the upload & save process on the server is completed.
[DataContract]
public class FileDesc
{
[DataMember]
public string name { get; set; }
[DataMember]
public string path { get; set; }
[DataMember]
public long size { get; set; }
public FileDesc(string n, string p, long s)
{
name = n;
path = p;
size = s;
}
}
The ApiController will contain one async method - Post(). It will return an IList of FileDesc objects. As any C# 5.0 async methods, it’s wrapped in a Task T wrapper.
public async Task<IList<FileDesc>> Post()
{
List<FileDesc> result = new List<FileDesc>();
if (Request.Content.IsMimeMultipartContent())
{
try
{
if (!Directory.Exists(PATH))
{
Directory.CreateDirectory(PATH);
}

MultipartFormDataStreamProvider stream = new MultipartFormDataStreamProvider(PATH);

IEnumerable<HttpContent> bodyparts = await Request.Content.ReadAsMultipartAsync(stream);
IDictionary<string, string> bodyPartFiles = stream.BodyPartFileNames;
IList<string> newFiles = new List<string>();

foreach(var item in bodyPartFiles) {
var newName = string.Empty;
var file = new FileInfo(item.Value);

if (item.Key.Contains("""))
newName = Path.Combine(file.Directory.ToString(), item.Key.Substring(1, item.Key.Length-2));
else
newName = Path.Combine(file.Directory.ToString(), item.Key);

File.Move(file.FullName, newName);
newFiles.Add(newName);
}

var uploadedFiles = newFiles.Select(i =>
{
var fi = new FileInfo(i);
return new FileDesc(fi.Name, fi.FullName, fi.Length);
}).ToList();

result.AddRange(uploadedFiles);
}
catch (Exception e)
{
}
}
return result;
}
}
The code is quite simple but let’s walk through it quickly. First we check if the content is indeed MIME/multi-part. Then we instantiate MultipartFormDataStreamProvider using the PATH to the location where we want to save the files in. Next step is to read the multipart body of the request in an async wait (hence, await method). This also saves the files physically on the HDD. We need to change the name later on using File.Move, since MultipartFormDataStreamProvider saves with value and we need the key. The Multipart handling is going to change after the RC (in fact if you grab latest source from Nuget nightly builds you’d see it already did, I will blog about it in the future), but with Web API RC, it is how it is, so this unpleasant step has to be taken.
Then we create an IDictionary which will contain key/value pairs of the file names and contents of the files that have just been saved. Finally we use that IDictionary in conjunction with FileInfo object to build up a List of FileDesc (our custom) objects to return.
Trying the upload yourself 🔗
That’s it, amazingly simple, isn’t it? Now let’s try it out. The only thing to mention here is that, since we are heavily relying on HTML5 (File API, drag and drop) and XHR2 (FormData) the functionality will only work in the modern browsers - according to this article, it is supported by:
- Chrome 7+
- Firefox 4+
- IE 10+
- Safari 5+
Surprisingly, no Opera support.
Ok, so launch the website and try to drag some files over. Our humble interface is shown on the screenshot below.
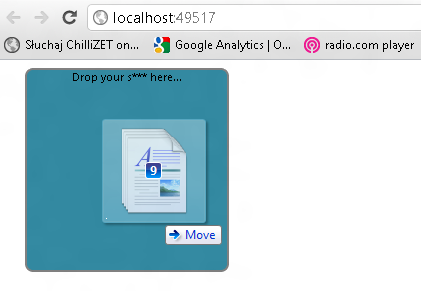
Notice that, since we set up the dragenter and dragout events, the drop area changes color when it needs to. Also, Windows 8, in a very nice way tells us that we are about to “move” some files.
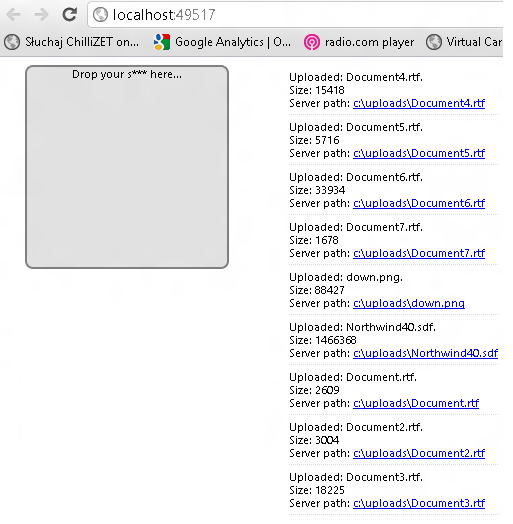
When we drop the files, the upload happens automatically, and knockout.js powered upload list informs us about the successfully uploaded files immediately.
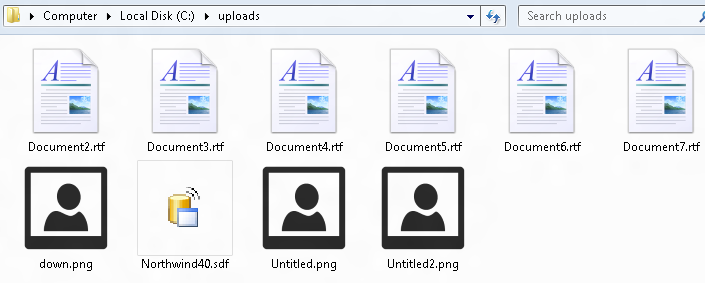
We can also navigate to the physical folder itself to verify that the upload happened without any problems indeed.
Source files & Summary 🔗
Again, as it is always the case with tutorial examples, there is plenty more that can be done - i.e. adding progress bars, or some sophisticated graphics. You can do it yourself, because… as usually, you can grab the source files! 🙂
Remember, this is a VS12RC project so if you don’t have it yet, grab the beta asap!
- source code is on GitHub


