A while ago, I wrote a post on uploading files to ASP.NET Web API by dragging and dropping them to the browser. Today I will continue with the same topic, but instead, let’s build a WPF application to which you can drag and drop files, and they’ll get uploaded to ASP.NET Web API.
The important thing, is that we will use the *exact* same Web API upload controller as before, meaning the same controller will be handling uploads from the browser and from the client (WPF) application. The client will use the new HttpClient and it’s client-side DelegatingHandlers.
The Plan 🔗
So the plan for today as follows:
- User starts a WPF client application and drags and drops a number of files to it.
- The application reads the files, displays them in a list and submits to ASP.NET Web API
- The progress bar indicates to percentage of upload progress
- Once the files are successfully uploaded, the list of files is updated with the information which file has been uploaded and what is its size
Upload controller 🔗
As mentioned, the upload controller is the same as in this post. If you have your own implementation you can use it, if not just grab the source project from that post and run that.
The idea is that I will have this Web API application running locally, and WPF application will submit files to it over HTTP. Of course in normal scenario the two apps wouldn’t be run on the same machine, but since they will be communicating over HTTP only, that’s enough for this demo. If you read (or at least skimmed) the previous post, the Web API controller saves the uploaded files to c:/uploads.
WPF client 🔗
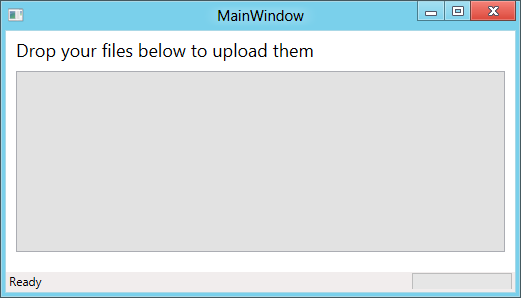
The upload client is very simple:
It contains a drop area - Listbox - which will also list the files after they have been dropped, and a status bar, which will display helpful messages and a progress bar in a bottom right corner.
XAML for the application is as follows:
<Window x:Class="WpfApplication1.MainWindow" xmlns="http://schemas.microsoft.com/winfx/2006/xaml/presentation" xmlns:x="http://schemas.microsoft.com/winfx/2006/xaml" Title="MainWindow" Height="300" Width="525">
<Grid Margin="0,0,0,0">
<Grid.RowDefinitions>
<RowDefinition Height="40" />
<RowDefinition Height="*" />
<RowDefinition Height="20" />
</Grid.RowDefinitions>
<StackPanel HorizontalAlignment="Left" Height="30" Margin="10,7,0,0" VerticalAlignment="Top" Grid.Row="0">
<TextBlock TextWrapping="Wrap" Text="Drop your files below to upload them" FontSize="18"/>
</StackPanel>
<ListBox ItemsSource="{Binding Path=Files}" Grid.Row="1" Name="DropBox" HorizontalAlignment="Left" Height="181" Margin="10,0,0,0" VerticalAlignment="Top" Width="489" AllowDrop="True" Drop="DropBox\_Drop" DragOver="DropBox\_DragOver" DragLeave="DropBox_DragLeave" Background="#FFE2E2E2" FontSize="10">
</ListBox>
<StatusBar Grid.Row="2" Height="22" VerticalAlignment="Bottom">
<StatusBar.ItemsPanel>
<ItemsPanelTemplate>
<Grid>
<Grid.RowDefinitions>
<RowDefinition Height="*"/>
</Grid.RowDefinitions>
<Grid.ColumnDefinitions>
<ColumnDefinition Width="*"/>
<ColumnDefinition Width="Auto" MinWidth="100"/>
</Grid.ColumnDefinitions>
</Grid>
</ItemsPanelTemplate>
</StatusBar.ItemsPanel>
<StatusBarItem>
<TextBlock Name="StatusIndicator" Text="Ready"></TextBlock>
</StatusBarItem>
<StatusBarItem Grid.Column="1">
<ProgressBar Width="100" Height="20" Name="ProgressBar"/>
</StatusBarItem>
</StatusBar>
</Grid>
</Window>
This is very basic, so not much to discuss really. One basic Grid, a TexBlock, ListBox and a StatusBar. So far so good. Let’ go to the code behind.
First of all, notice in the XAML that the ListBox is bound to a collection called Files.
public ObservableCollection<string> Files
{
get
{
return _files;
}
}
private ObservableCollection<string> _files = new ObservableCollection<string>();
That’s a public property of the MainWindow, and will be used to keep track of our uploaded files. While in this simple example we don’t use a view model at all, it is still nicer to use a bound collection rather than manually add and remove items from the listbox. To make this work, we need to set the DataContext of the MainWindow to this, and we do that in the constructor.
public MainWindow()
{
InitializeComponent();
this.DataContext = this;
}
Code behind - drag events 🔗
First thing to do programatically is to handle three drag events - over, leave and drop. These events are attached to the Listbox element.
- Drag over
private void DropBox_DragOver(object sender, DragEventArgs e)
{
if (e.Data.GetDataPresent(DataFormats.FileDrop))
{
e.Effects = DragDropEffects.Copy;
var listbox = sender as ListBox;
listbox.Background = new SolidColorBrush(Color.FromRgb(155, 155, 155));
}
else
{
e.Effects = DragDropEffects.None;
}
}
On drag over, we want to indicate to the user that copy is possible, so we change the cursor to “copy” and change the color of the listbox.
- Drag leave
private void DropBox_DragLeave(object sender, DragEventArgs e)
{
var listbox = sender as ListBox;
listbox.Background = new SolidColorBrush(Color.FromRgb(226, 226, 226));
}
On drag leave, we just want to set the background color back to what it was initially.
- Drag drop
private void DropBox_Drop(object sender, DragEventArgs e)
{
if (e.Data.GetDataPresent(DataFormats.FileDrop))
{
_files.Clear();
string[] files = (string[])e.Data.GetData(DataFormats.FileDrop);

foreach (string filePath in files)
{
_files.Add(filePath);
}

UploadFiles(files);
}

var listbox = sender as ListBox;
listbox.Background = new SolidColorBrush(Color.FromRgb(226, 226, 226));
}
On drop, we read the list of file paths from the event arguments, and add them to the aforementioned files ObservableCollection which we are using to bind the UI and codebehind together.
Then we call the UploadFiles method, the core of our application, and set the background color back (since the drag leave event won’t happen anymore).
Uploading files 🔗
Now let’s look at the method responsible for the upload of files.
The request will be despatched by the new HttpClient and pass through a ProgressMessageHandler, which will, in turn, track the progress of the file upload. Please note that this feature is not part of the standard System.Net.Http you’d normally reference from a WPF application, as it’s shipping with ASP.NET Web API. The solution is to include in the project system.Net.Http.Formatting from ASP.NET Web API package on Nuget (you might as well grab entire Web API client libraries, since we’ll be using JSON.NET later on for deserialization anyway so it will come in useful). However, this ProgressMessageHandler is relatively new, and hasn’t made it into the Web API RC (but will be part of the final release), so to use this you’d need daily build from Nuget.
Henrik Nielsen has great instructions on how to set it up, it’s very easy, and with Web API RC, there is no GAC anymore.
One more thing worth noting, since we are uploading files, the content for our HTTP request will be MultipartFormDataContent.
private void UploadFiles(string[] files)
{
ProgressMessageHandler progress = new ProgressMessageHandler();
progress.HttpSendProgress += new EventHandler<HttpProgressEventArgs>(HttpSendProgress);

HttpRequestMessage message = new HttpRequestMessage();
MultipartFormDataContent content = new MultipartFormDataContent();

try
{
foreach (var file in files)
{
FileStream filestream = new FileStream(file, FileMode.Open);
string fileName = System.IO.Path.GetFileName(file);
content.Add(new StreamContent(filestream), "file", fileName);
}

message.Method = HttpMethod.Post;
message.Content = content;
message.RequestUri = new Uri("http://localhost:51884/api/uploading/");
ThreadSafeUpdateStatus(String.Format("Uploading {0} files", files.Count()));

var client = HttpClientFactory.Create(progress);
client.SendAsync(message).ContinueWith(task =>
{
if (task.Result.IsSuccessStatusCode)
{
ThreadSafeUpdateStatus(String.Format("Uploaded {0} files", files.Count()));
var response = task.Result.Content.ReadAsStringAsync();
dynamic json = JsonConvert.DeserializeObject<List<FileDesc>>(response.Result);
foreach (var item in json)
{
var listitem = _files.FirstOrDefault(i => i.Contains(item.name));
Application.Current.Dispatcher.Invoke(
DispatcherPriority.Normal, (Action)delegate()
{
_files.Remove(listitem);
});
listitem += String.Format(" - successfully uploaded. Size: {0}", item.size);
Application.Current.Dispatcher.Invoke(
DispatcherPriority.Normal,(Action)delegate()
{
_files.Add(listitem);
});
}
}
else
{
ThreadSafeUpdateStatus("Sorry there has been an error");
}
});
}
catch (Exception e)
{
//Handle exceptions - file not found, access denied, no internet connection etc etc
}
}
So a quick walkthrough of what is happening above:
-
We create the progress handler, wire up the upload event (I’ll show the event code in a moment), create an empty HttpRequestMessage and it’s MultipartFormDataContent
-
We iterate through the list of file paths, and read all of them using FileStream, and then append to the request body
-
We add additional request information, such as HttpMethod and our Web API’s URL. We display a status bar information that files are being uploaded. This is done through a helper method which I will get back to in a moment.
-
We construct the HttpClient using HttpClientFactory and invoke a request using SendAsync. This is the point when our files get sent to the Web API. The method is async, so whatever we want to do later, we need to wrap in ContinueWith (note, in .NET 4.5 it’s much easier, with await modifier).
-
If the response is successful, we read what the Web API has returned to us and update the status bar accordingly. If you had a look at the HTML5 upload tutorial, where the Web API controller is being described in detail, you’d know that the API returns a list of JSON serialized List of simple custom FileDesc objects, which expose three properties: name, size and path. Since we want to unwrap JSON into strongly typed object, I add the following class to the project.
public class FileDesc
{
public string name { get; set; }
public string path { get; set; }
public long size { get; set; }
}
Next, we iterate through the returned collection of files, and try to match them, by filename, to the files we already have in our observable collection bound to the listbox. If the match is found, it means the file has been successfully uploaded, so we update the collection by adding appropriate information (file size, and info that it’s uploaded).
To do that we need to use Application.Current.Dispatcher, since the thread running the callback on the async upload cannot directly update the “files” observable collection. If we tried to do that, we’d run into “This type of CollectionView does not support changes to its SourceCollection from a thread different from the Dispatcher thread.” exception.
- If there is an error, we display it in the status bar. We wrap everything in try catch, since there are plenty of possible exceptions to handle, but I will not be focusing on them here.
Finally, let’s have a look at the two things we skipped. First, the progress handler.
private void HttpSendProgress(object sender, HttpProgressEventArgs e)
{
HttpRequestMessage request = sender as HttpRequestMessage;
ProgressBar.Dispatcher.BeginInvoke(
DispatcherPriority.Normal, new DispatcherOperationCallback(delegate
{
ProgressBar.Value = e.ProgressPercentage;
return null;
}), null);
}
The ability to track upload and download progress just like that, is a wonderful addition to the ASP.NET Web API (or rather to the System.Net.Http, since as you can see here you can use it outside Web API as well). It exposes all kinds of useful information for up- and download of data when communicating with the HTTP endpoint.
In our case, we leverage on HttpProgressEventArgs.ProgressPercentage which can be directly assigned to WPF’s ProgressBar and utilized to visually track upload progress. Again, due to threading safety, we use Dispatcher to asynchronously invoke the update of the UI. If tried to access ProgressBar directly, we’d run into “The calling thread cannot access this object because a different thread owns it” exception.
The last method to look at is the private void ThreadSafeUpdateStatus(string status). As you have seen, we’ve used it all across the board to update the status bar.
private void ThreadSafeUpdateStatus(string status)
{
StatusIndicator.Dispatcher.BeginInvoke(
DispatcherPriority.Normal, new DispatcherOperationCallback(delegate
{
StatusIndicator.Text = status;
return null;
}), null);
}
Trying it out 🔗
Let’s try if the application works. First, we need to make sure the Web API application is running.
Now, let’s run our beautiful UI.
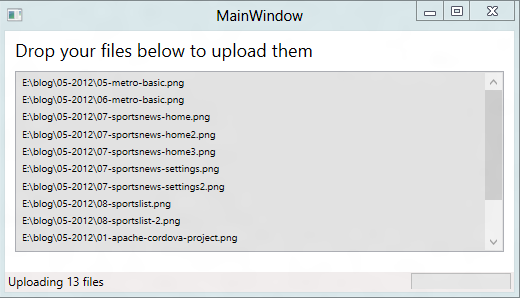
And drag some files into it. The status bar shows the file count.
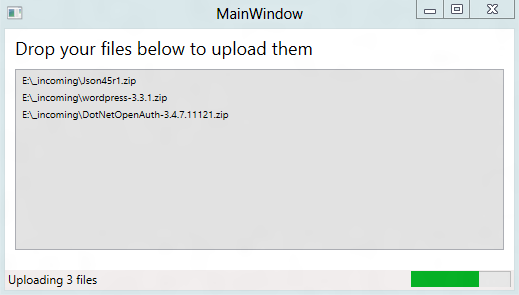
The progress bar will be indicating progress (especially useful with larger files or many files).
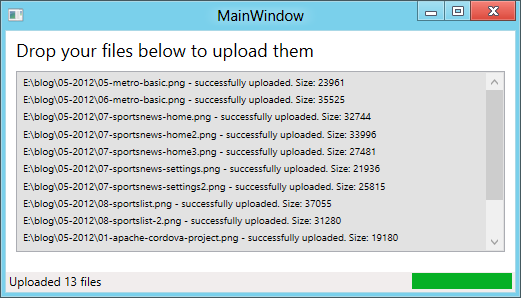
If upload is successful, the list indicates that beside each file. The status bar indicates successful upload.
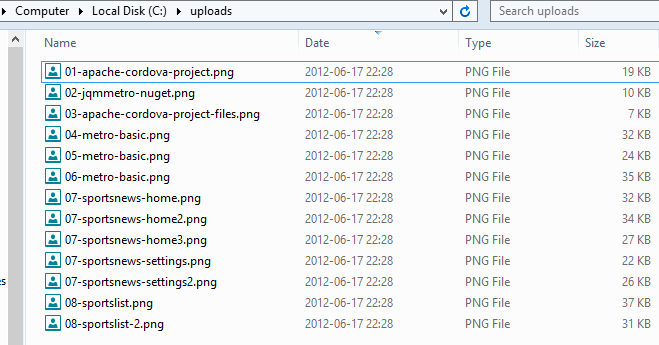
And, just to verify, the files end up where they should have (c:/uploads).
Summary and source code 🔗
This is a second part of this mini drag and drop series, I hoped you enjoyed the WPF one, as much as the HTML5 one. I hope someone finds some use for this technique in real life projects. Also, you may note that the upload code can be very reusable, for example you might use it to sync files in some folder with those on the Web API server, suing i.e. Windows Service.
Anyway, the source code is attached, as always:

