We all have different devices at home, right? So I had this idea, why not make a small Web API driven Windows service to sit on my main machine, to which I can send documents, which in turn will send them to the printer and print out. Sounds great doesn’t it?
Since Web API self host can be without any problems hosted as Windows Service, the whole application is really simple to put together. Let’s do that.
Few things to consider about printing 🔗
While .NET is very rich in classes and utilities to facilitate printing, ultimately it’s very difficult to provide any sort of generic printing solution, since every file format is different and needs to be treated differently.
For example, if you wish to create print out of text data that you have in memory (string, images) you could easily use the classes contained in the System.Drawing.Printing, such as PrintDocument and related. Unfortunately since we are opting to be able to print any files rather than just those that can be easily read into string representation, that’s hardly a solution for us (imagine trying to print a PDF or DOCX file using that).
Another possiblity is using System.Printing services, which allows us to programmatically access print servers, print queues and so on. This allows us to even send raw byte[] data to the printer. However there are additional considerations there since not every printer would be able to correctly determine how a given stream of data should be printed. But if you develop a line of business solution you should definitely look into that.
For this example though, I will use a third option which is using the good old ShellExecute of the COM interop. Don’t worry though, I will not bring in any C++ or Marshals here, in fact, the Process class allows us to very easily execute shell commands.
Hosting Web API in Windows service 🔗
If you need a basic intro into how to set up a Windows Service with a self hosted Web API inside of it, please have a look at a great introductory post by my friend Piotr.
I will skip the basics and go straight to the implementation, so create a service, import the self host package from Nuget.
public partial class PrintApiService : ServiceBase
{
private HttpSelfHostServer _server;
private readonly HttpSelfHostConfiguration _config;
public const string ServiceAddress = "http://localhost:599";

public PrintApiService()
{
InitializeComponent();

_config = new HttpSelfHostConfiguration(ServiceAddress);
_config.Routes.MapHttpRoute("Default",
"{controller}/{id}",
new { controller = "Start", id = RouteParameter.Optional });
}

protected override void OnStart(string[] args)
{
\_server = new HttpSelfHostServer(\_config);
_server.OpenAsync();
}

protected override void OnStop()
{
_server.CloseAsync().Wait();
_server.Dispose();
}
}
As you see we will have a default introductory route, which will be the start page. Users from different devices should be able to navigate to this page, which will show them a file upload dialog. The should select as many files as they wish, upload them using the Windows Service and once uploaded, they will get sent to printer and printed.
We will need two controllers, so add a Controllers folder and add PrintController and StartController.
public class StartController : ApiController
{
public HttpResponseMessage Get()
{
var response = new HttpResponseMessage();
response.Content = new StringContent(File.ReadAllText(@"c:PrintServicestart.html"));
response.Content.Headers.ContentType = new MediaTypeHeaderValue("text/html");
return response;
}
}

public class PrintController : ApiController
{
public Task<HttpResponseMessage> Post()
{
var rootUrl = "c:/PrintService/Uploads/";

if (Request.Content.IsMimeMultipartContent())
{
var streamProvider = new CustomMultipartFormDataStreamProvider(rootUrl);
var task = Request.Content.ReadAsMultipartAsync(streamProvider).ContinueWith<HttpResponseMessage>(t =>
{
if (t.IsFaulted || t.IsCanceled)
throw new HttpResponseException(HttpStatusCode.InternalServerError);

t.Result.FileData.ToList().ForEach(i =>
{
var info = new FileInfo(i.LocalFileName);
Print(info.FullName);
});

return new HttpResponseMessage(HttpStatusCode.OK);
});
return task;
}

throw new HttpResponseException(Request.CreateResponse(HttpStatusCode.NotAcceptable, "This request is not properly formatted"));
}

private void Print(string path) {
//TODO
}
}
As you probably noticed, we need a folder to work with - to store & process the data. There are better ways to do that when using Windows Services, but for the sake of brevity I just hardcoded a path to c:PrintService.
The StartController will serve up an HTML file located in that folder. This will be our UI.
The PrintController will accept the file upload, write them to disk, and then iterate through them and print each one. I will not explain the inner working of the upload here, since I have already blogged about that - the code here is the same as in that post, so have a look there if something doesn’t seem to add up for you.
The HTML for the start.html is also take from that blog post and is very simple, as all it provides is an interface to upload files:
</p>

</body>
</html>
If we were using System.Printing instead of ShellExecute we could upload files using MultipartMemoryStreamProvider because all we would be needing would be a stream representation of the files to be sent to the printer. In our case, we need physical files, so we let MultipartFormDataStreamProvider write them to the disk for us.
Additional Windows Service settings 🔗
A couple of small things we need to add to our Windows Service:
Right click on the service designer window and Add Installer.
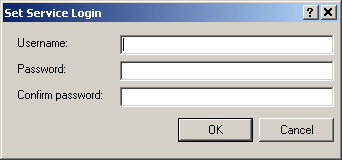
In the service process installer properties, change the install account to User.
We’ll need that to simplify things as we don’t want to have to go through all the CreateProcessAsUser or OpenProcessToken extravaganza and avoid calling Win32 to impersonate user.
As a result you will be prompted to enter user credentials when installing the service, rather than having it run under a local system account. We need that since prinitng via ShellExecute will require us to run ini the context of a user - so that we know what kind of program is associated with a specific file type.
Another thing we might want to add in the properties, is a meaningful name of the service, i.e. PrintApiService.
Printing using ShellExecute 🔗
In order to print with >ShellExecute in C++ we’d have to invoke that:
HINSTANCE ShellExecute(
\_In\_opt_ HWND hwnd,
\_In\_opt_ LPCTSTR lpOperation,
\_In\_ LPCTSTR lpFile,
\_In\_opt_ LPCTSTR lpParameters,
\_In\_opt_ LPCTSTR lpDirectory,
\_In\_ INT nShowCmd
);
lpOperation can be “print” - in this case, the default print operation of the default associated application will be called. I.e. for TXT files it will be print as if called from Notepad, for PDF files it will be print as if called from Acrobat Reader and so on - depending on the settings in the user’s system.
Thankfully we don’t have to write any interop code - System.Diagnostics.Process allows us to take some nice shortcuts. Let’s go back to the Print function in or controller which we left empty before:
private void Print(string path)
{
if (File.Exists(path))
{
var printJob = new Process
{
StartInfo = new ProcessStartInfo
{
FileName = path,
UseShellExecute = true,
Verb = "print",
CreateNoWindow = true,
WindowStyle = ProcessWindowStyle.Hidden,
WorkingDirectory = Path.GetDirectoryName(path)
}
};

printJob.Start();
}
}
What this small bit of code does, is it invokes the shell “print” on the file. Since we are running in the context of the user, the file will have some association to a default program (i.e. DOC - MS Word, TXT - Notepad) and the operation of sending to a printer will silently happen.
Installing the service 🔗
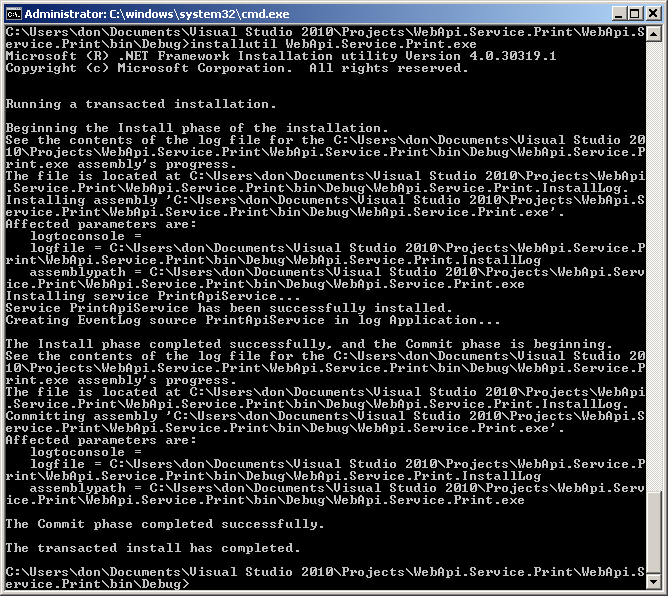
OK, now that we have everything in place, we can install the service. Normally you’d install the service using installutil from the command line.
Compile the service project, and go to the bin/Debug folder of your solution and run:
installutil WebApi.Service.Print.exe
This triggers the installation process, and you should be prompted to provide a username and a password since the service is supposed to run in the context of a user account. Remember to use the computer name as a domain if you are not memebr of any AD domain.
If your command prompt doesn’t recognize installutil command, go to Envrionment Variables and add C:WindowsMicrosoft.NETFrameworkv4.0.30319 to the PATH variable.
Once installed go to Windows Services and start the service.
You can see, contrary to other services, it runs as my user (don’t laugh at the username - watched way too many gangster movies 🙂 ).
Trying it out 🔗
Now that everything is in place, you can go to the address we specified in the service: http://localhost:599/.
Of course from localhost this hardly makes any sense, as you can obviously always just print directly - but since we now have a fully functional server running in the service, we could navigate to the UI page from any network-connected device, in my case it’s 192.168.0.174:599 - and that’s what we were trying to do here after all.
Choose a few files, and submit them.
I am using PDFCreator fake printer in this case to monitor printing jobs. A small side note here - by default PDFCreator will fire up a window allowing you to change file name, and print settings - I have switched it off in my PDFCreator so that it behaves like a typical printer, and doesn’t fire any UI dialogs, but just prints, or to be precise “prints” since it fakes prinitng by creating PDF files.
For various security reasons, Windows Services cannot create any UI components in the current user’s session (i.e. open new windows). This is the so called Session 0 Isolation.
There are various ways to circumvent this with some clever hacking - and although this is a very interesting topic - it’s beyond the scope of this article.
So if you submit the files, you’d see the files, one by one, getting processed in the print queue:
And since I setup my PDFCreator printer to save to a specific folder, I can see the “printouts” there (the equivalent of the sheets of paper getting spat out from a real printer).
Now, I can do the same from i.e. my mobile phone via the mobile browser (provided port is open in the firewall of course) using the aforementioned IP address, and the files get printed as well (I’m not sure how to prove on screenshots that it works, but believe me, it does 🙂 )
Summary & source code 🔗
I added the source code for this app to GitHub, so you can grab it from there. Hopefully you will find some of the ideas used in this article useful in your projects.
I think the bottom line is that yet again we can see, that with some simple code and the use of Web API, we could build really cool stuff


