Few weeks ago, I blogged about using Azure Mobile Services in your Web API applications and I think I managed to convince some of you that ZUMO with its REST-style API is really useful and super easy to work with.
The guys at Azure Mobile Services are not slowing down at all. Today Scott Gu announced a whole new super cool set of upgrades, and one of the coolest features is the integration to Twillio and the ability to send text messages (SMS) directly from the ZUMO script.
Let’s go ahead and extend our previous ZUMO example (managing a list of sports team) with SMS messaging.
What are we going to do 🔗
There is probably no need for me to explain how many great use cases one might find for an SMS-messaging in web application, especially those related to security or system monitoring.
In this example, I will take the code from the aforementioned previous blog post, and whenever a user inserts a team into the Azure table, a text message will be sent notifying about this addition.
The code 🔗
The core code is the same.
All we need to do is add a simple model for the SMS:
public class SMS
{
public string Sender { get; set; }
public string Receipient { get; set; }
public string Messagebody { get; set; }
}
And a new version of the Post() method:
public Task<HttpResponseMessage> Post(Team team)
{
if (!ModelState.IsValid)
throw new HttpResponseException(HttpStatusCode.BadRequest);

var obj = JsonConvert.SerializeObject(team, new JsonSerializerSettings() { NullValueHandling = NullValueHandling.Ignore });
var request = new HttpRequestMessage(HttpMethod.Post, "https://YOUR_SERVICE.azure-mobile.net/tables/Teams");
request.Content = new StringContent(obj, Encoding.UTF8, "application/json");

var dataTask = client.SendAsync(request).ContinueWith<Task<HttpResponseMessage>>(t =>
{
if (!t.Result.IsSuccessStatusCode)
throw new HttpResponseException(t.Result.StatusCode);

var sms = new SMS
{
Sender = "YOUR\_TWILLIO\_NUMBER",
Receipient = "YOUR\_RECEIPIENT\_NUMBER",
Messagebody = "Your insert of " + team.Name + " was successful!"
};

var smstask = client.PostAsJsonAsync("https://YOUR_SERVICE.azure-mobile.net/tables/TextMessages", sms).ContinueWith<HttpResponseMessage>(f => {
if (f.Result.IsSuccessStatusCode)
return new HttpResponseMessage(HttpStatusCode.OK);

throw new HttpResponseException(HttpStatusCode.InternalServerError);
});

return smstask;
});

return dataTask.Result;
}
Now, this code is a bit messy due to continuations - in .NET 4.5 it’s much cleaner - but very easy to follow anyways. We make the request to insert data into Azure Mobile Service, then if it’s successful, we make another request to a different Azure table, TextMessages which will save the text of the message, recepient data and send the message.
This is not the only way to do this, we could have had the Teams table handle everything - have the scripts responsible for sending SMS execute when data gets inserted to this table - but I think separating the two is cleaner and also allows us to call SMS-messaging at any time from .NET code, not just as by product of an insert to Teams.
The phone numbers - in this example I assumed would be simply hardcoded, there is no need to explain the different ways of managing these (conf files, input from user etc 🙂 ). The numbers should be used with a + in front (if international) or as regular 10-digit numbers (if in Canada or USA). Don’t worry about these for now, I’ll get to that part soon.
That’s it! That’s all the C# code we need. Let’s have a look at the Azure side.
Setting up Azure Mobile Services text messaging 🔗
I will not go into details about setting up ZUMO account and creating your first service - I have done that the last time we discussed ZUMO.
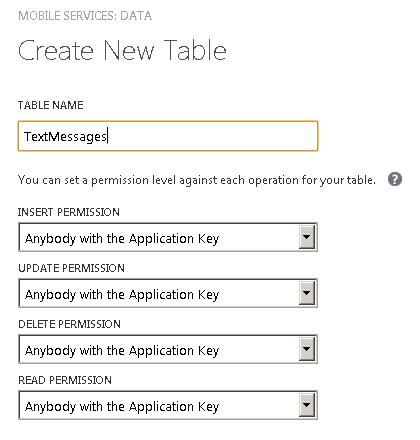
So let’s go straight away to adding new table to our existing service, called TextMessages:
Since we are using the previous service as a base, we can leave the authentication keys as they were before - nothing changes in this department.
In parallel, set up a Twillio account at this url.
It will generate a phone number for you that you could use as the from number in the messaging service.
You can find your Twillio number in the numbers page:
Now, go to the Azure Table > Script tab.
In here you can insert the code to be executed upon inserting data into the TextMessage table (remember - the way we defined our SMS service is that we submit a POST to ZUMO, save the text message in the table so that it acts as our log, and then send it):
function insert(item, user, request) {

var httpRequest = require('request');
var sid = "YOUR\_TWILLIO\_SID";
var token = "YOUR\_TWILLIO\_TOKEN";

var url = "https://" + sid + ":" + token +
"@api.twilio.com/2010-04-01/Accounts/" + sid + "/SMS/Messages.json";
var body = "From=" + item.Sender + "&To=" + item.Receipient + "&Body=" + item.Messagebody;

httpRequest.post({
url: url,
headers: { 'content-type': 'application/x-www-form-urlencoded' },
body: body
}, function (err, resp, body) {
console.log(body);
});
request.execute();
}
For that to work, you obviously need to add a SID and AUTH_TOKEN from your Twillio account (you can grab them from the Dashboard of your Twillio account).
Note that in order to make a request to Twillio from Azure scripts, we use Node.js (!) and its request module.
Trying it out 🔗
All that’s left now is to test it. I will make a request to add a new team from Fiddler:
Not surprisingly, Azure shows the message being inserted into the TextMessages table.
Azure Mobile Services logs show that the response from Twillio was successful:
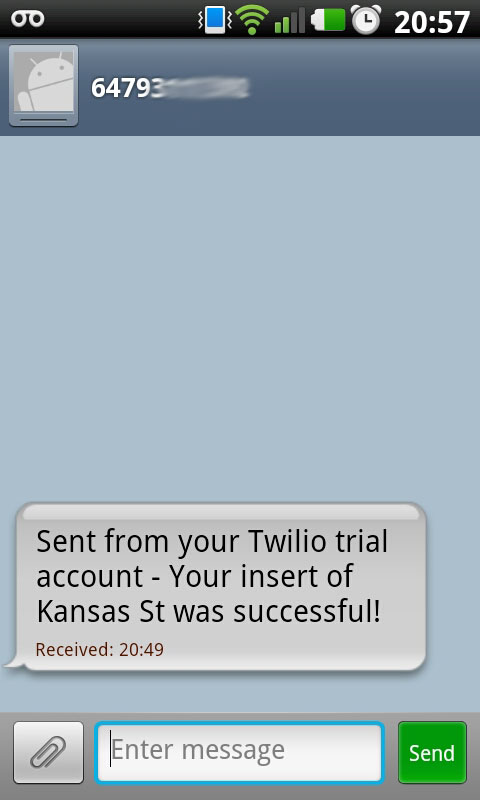
And finally, my phone buzzes and the message arrives on the cell phone:
And the whole “programming” part took maybe 15 minutes - and now we have a cloud storage for text messages and a cloud service for sending them. Pretty cool, eh?


